Oh my word! I ABSOLUTELY LOVE making food mosaics. I will make it work with any theme and boy, does it work. It doesn’t matter which grade I have made them with, from K- lower primary but they all ADORE it and are 100% zoned throughout. I am also always impressed with how well they follow instructions.
As Halloween is approaching, we will start making some really rad crafts. This year we have this cool FREEBIE for you, which you can grab at the end of the post. Be sure to check out our other Halloween Freebies too (Links at end of our post).
Doesn’t it look super duper cool?
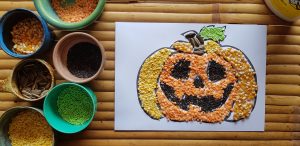
Mosaics are really fun to make but the end result is pretty epic. The kids love working with the different textures and are super proud to show of their creation once they’re hanging up in the class.
What ya making?
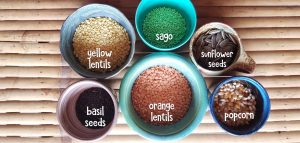
You will need:
- Board (card stock)
- White glue
- Yellow and orange lentils
- Popcorn seeds
- Basil seeds
- Sago (green)
- Sunflower seeds
You can totally change your ingredients to whatever is available and affordable. The ingredients I used are very affordable this side and most of them cost less than $2 for each pack.
Let’s get crafting!
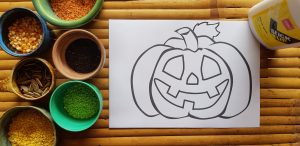
The first thing you will need to do is ensure that all ingredients are easily accessible to the kiddies. I really enjoy these trays that I found in the supermarket. They’re a perfect size and I must say, I am always impressed at how little mess there is at the end. Don’t get me wrong, there is certainly a mess but not nearly as much as one might expect.
Normally my kids would be sitting in groups and they would share trays but we’re back at school, following strict guidelines so the trays will be slightly different now. I generally have the small white glue container for each table, wonderful opportunity for the little ones to practice their squeezing (great hand workout), although I also walk around with my glue to help those who need.
We go through the rules and then work step by step making our mosaics.
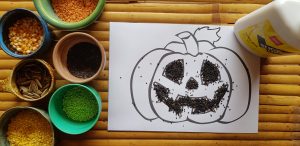
Once they have glued the goodies, they are instructed to lift it up to let the excess fall down. We generally let it fall on the ground, which we will sweep up once finished. Even though we’re making the same craft, it’s always fun seeing how unique they each turn out.
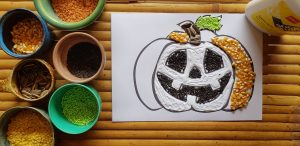
We also walk through how much glue is actually needed. Teachers are well aware, there are ALWAYS one or two kiddies that feel they must use the entire bottle of glue on their masterpiece 😉 but overall, they really handle it all with ease.
This year we have made the pumpkin template, bats flying with the moon in the background and a skull template. It’s hard to choose which one I like more as I think they turned out beautifully. I am also a sucker for making these. I find it rather relaxing;) haha 🙂 I get way too excited when doing these with the kids.
Sure…making crafts can be tiresome but it’s well worth all the prep and the pure joy in the faces while making it. 🙂
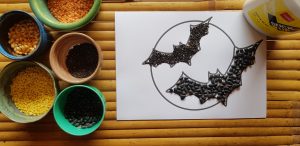 For the bats, I used basil seeds for the smaller one and black beans for the bigger one. I really like the effect it made.
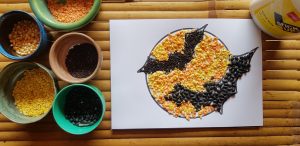
Instead of only using one ingredient for the moon, I chose to mix the yellow and orange lentils and even added some popcorn seeds. Again, I am a big fan of how they turned out.
So whether you’re a parent creating this with your little one at home or a teacher making these with a class full of eager faces, I hope you have a wonderful time. I would also love to see how they turned out and which ingredients you used. 🙂
FREEBIE ALERT:
Grab your Halloween mosaic template
Happy Halloween! Laura 🙂

